Create account
Sign up for a Novacal account by providing youremail address and creating a password, or using Google authentication.
Onboarding process
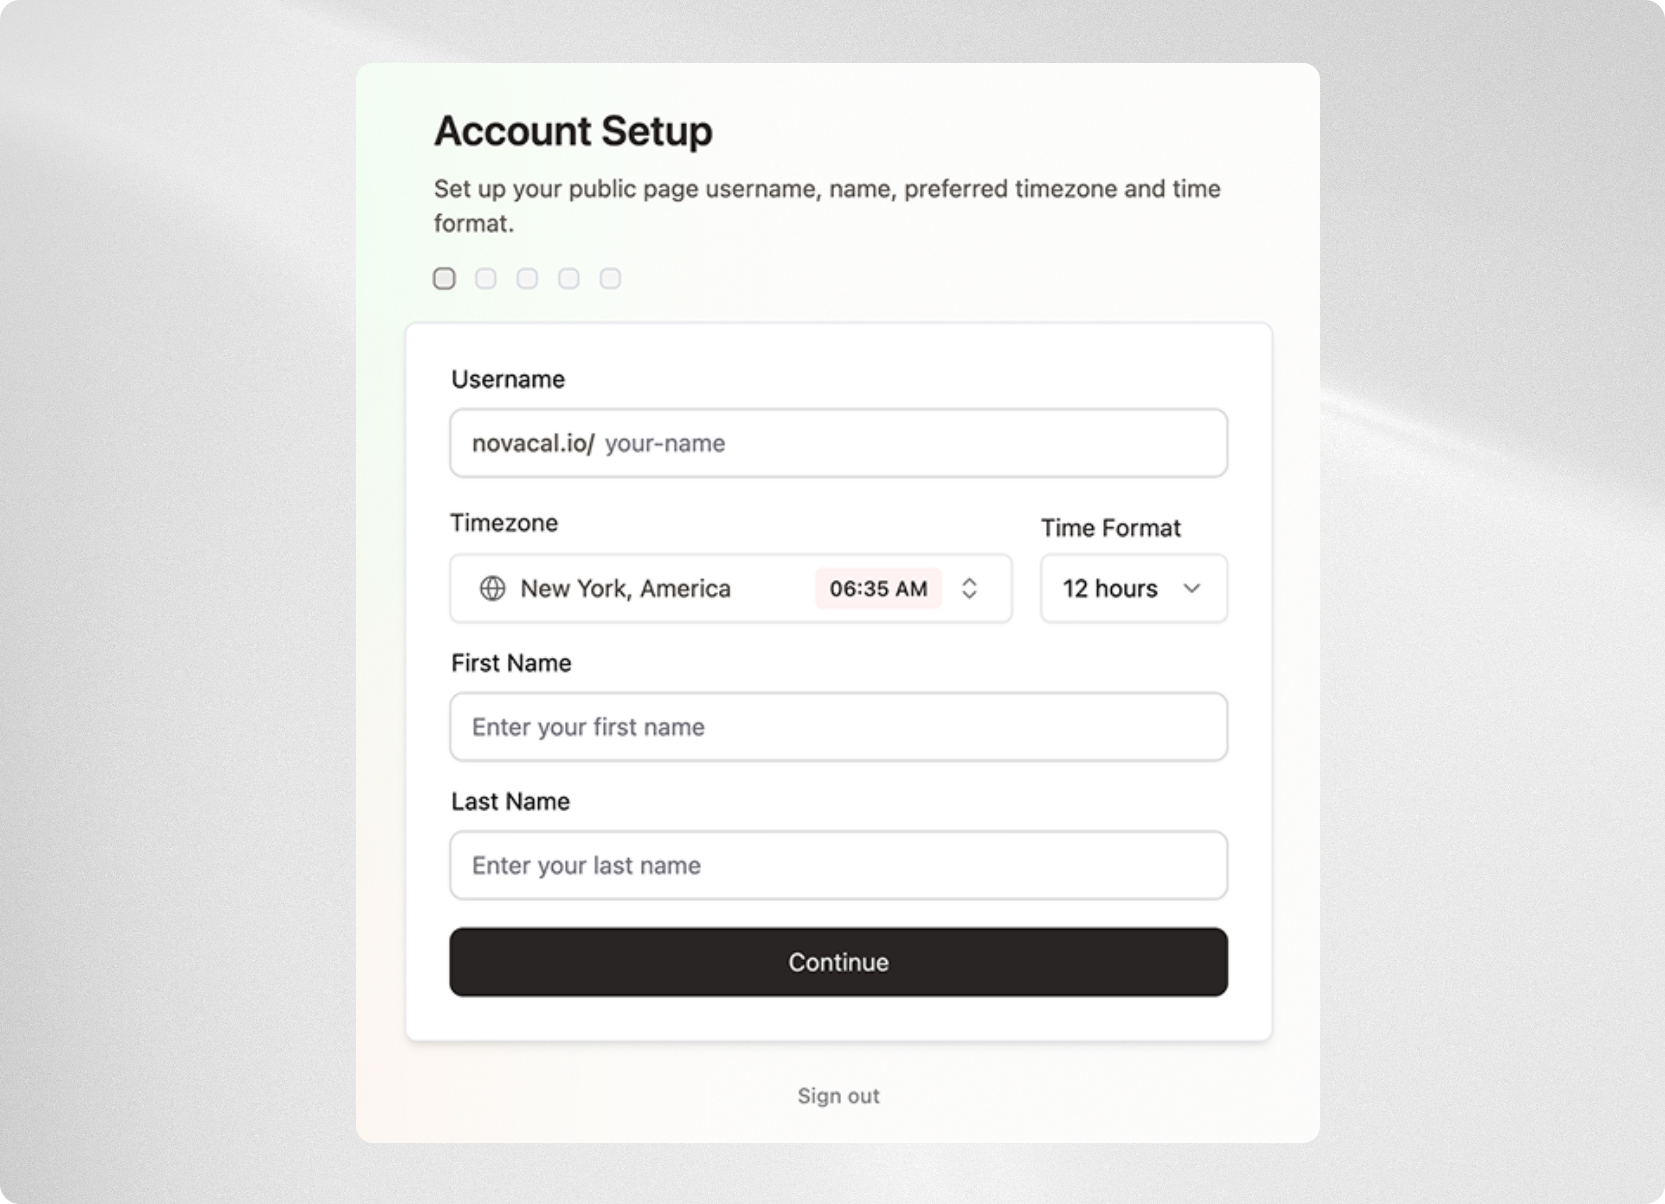
Once your account is created, you’ll go through a 5-step onboarding process to set up your scheduling preferences and connect your tools.Step 1: Set Up Personal Details
Enter your name and choose a username. Your username will form part of your public booking link (for example: novacal.io/username ), so select something that is clear and professional. You will also set your timezone, which ensures all scheduling is automatically adjusted for regional differences, and select your preferred time format (12-hour or 24-hour). The chosen format will be applied consistently across the platform.
Step 2: Availability
Define your schedule and main availability. These settings determine the time windows when others can book meetings with you. By setting your working hours, Novacal ensures that bookings are only offered during the periods you want to be available.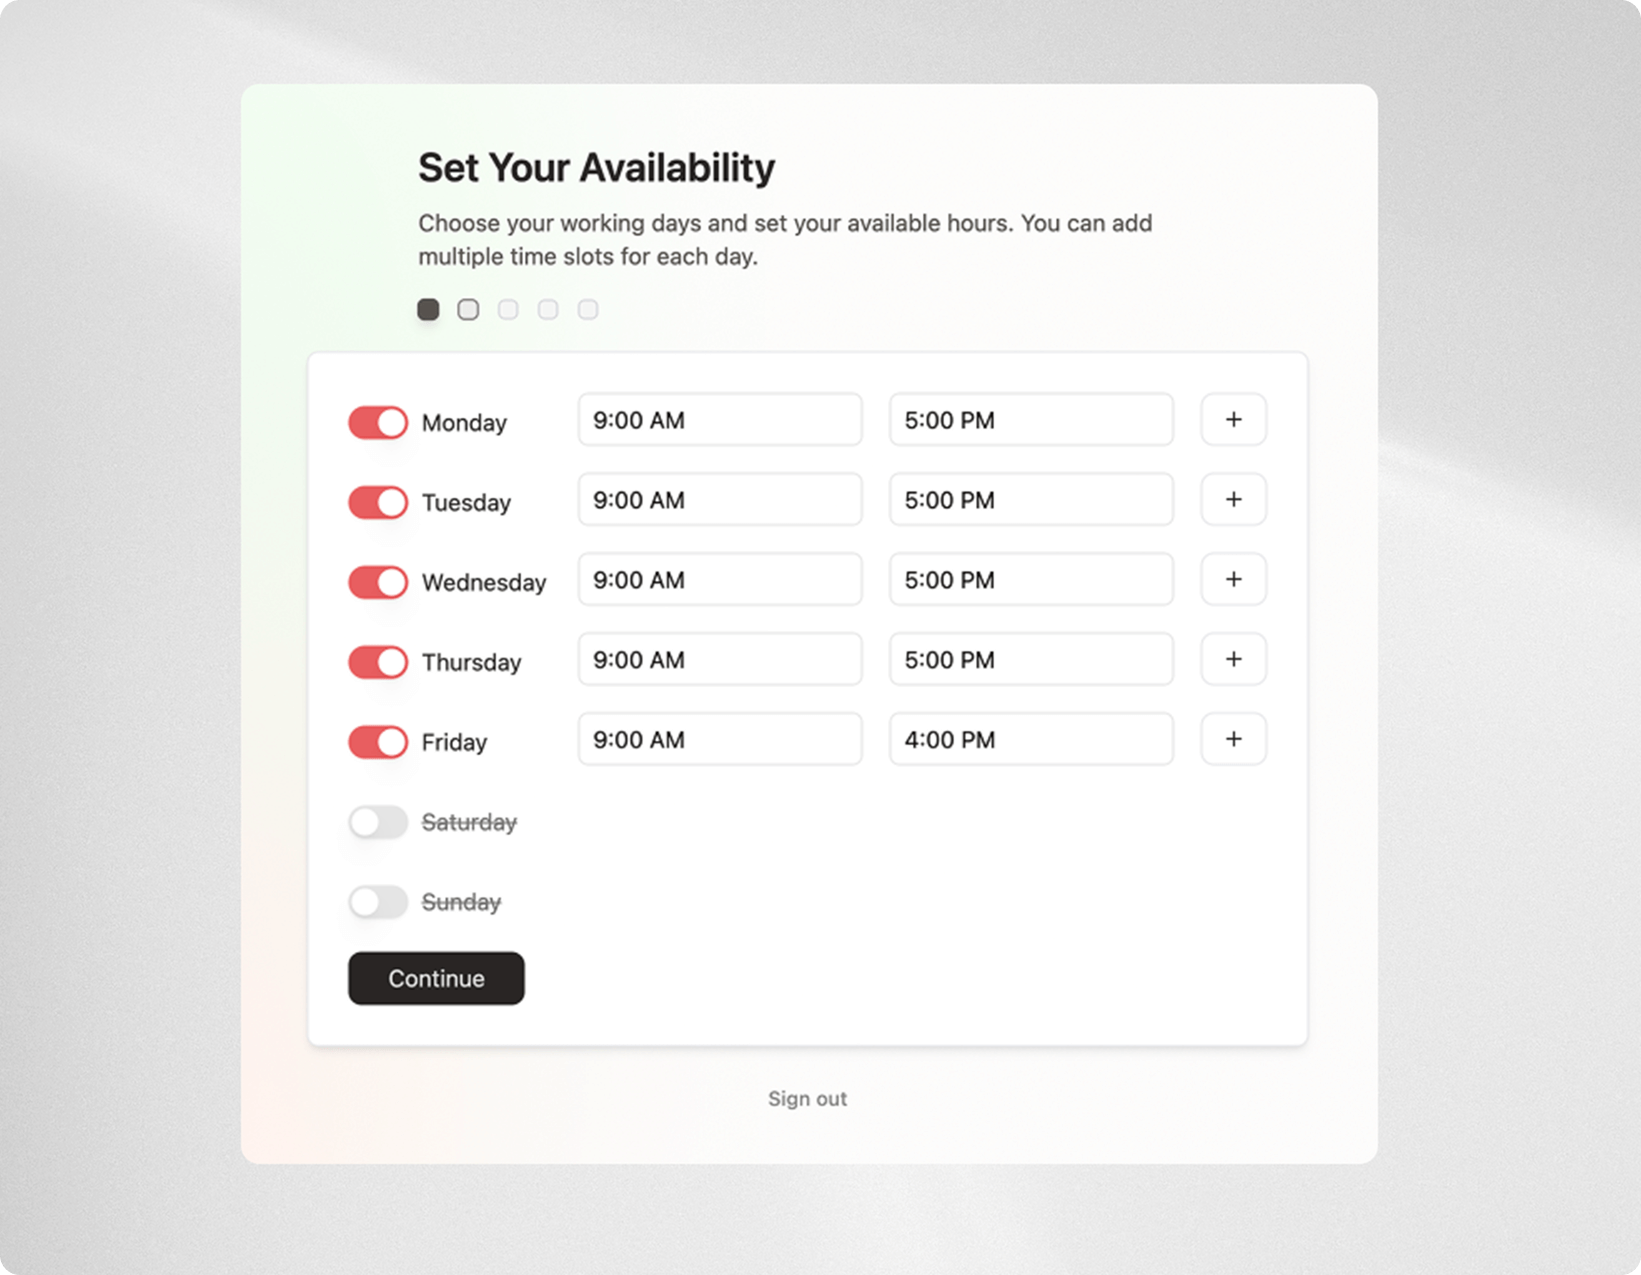
Step 3: Calendar connection
Connect your external calendars, including Google, Outlook, and Apple Calendar. You can specify which calendar Novacal should use to check for booking conflicts, ensuring meetings are never double-booked. You can also choose where new booked events should be automatically added, so your schedule always stays synchronized.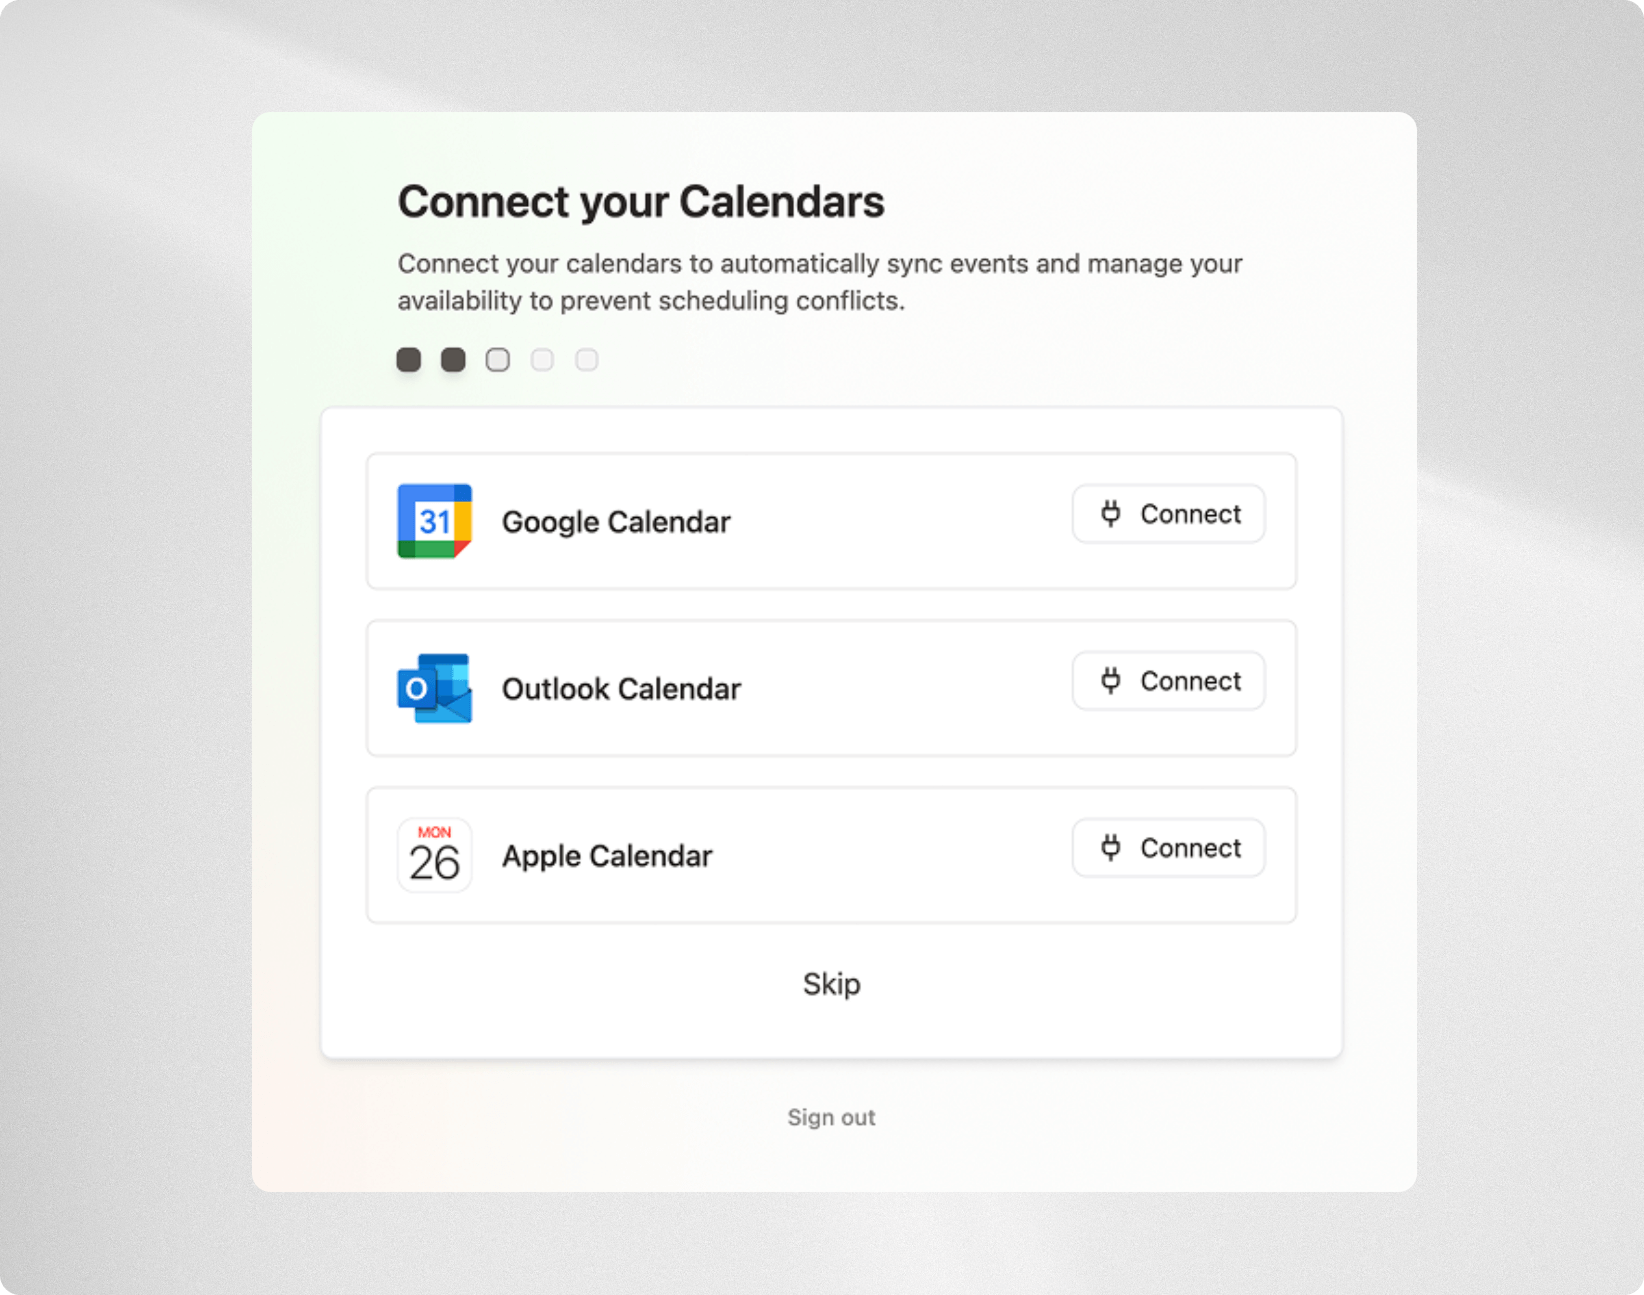
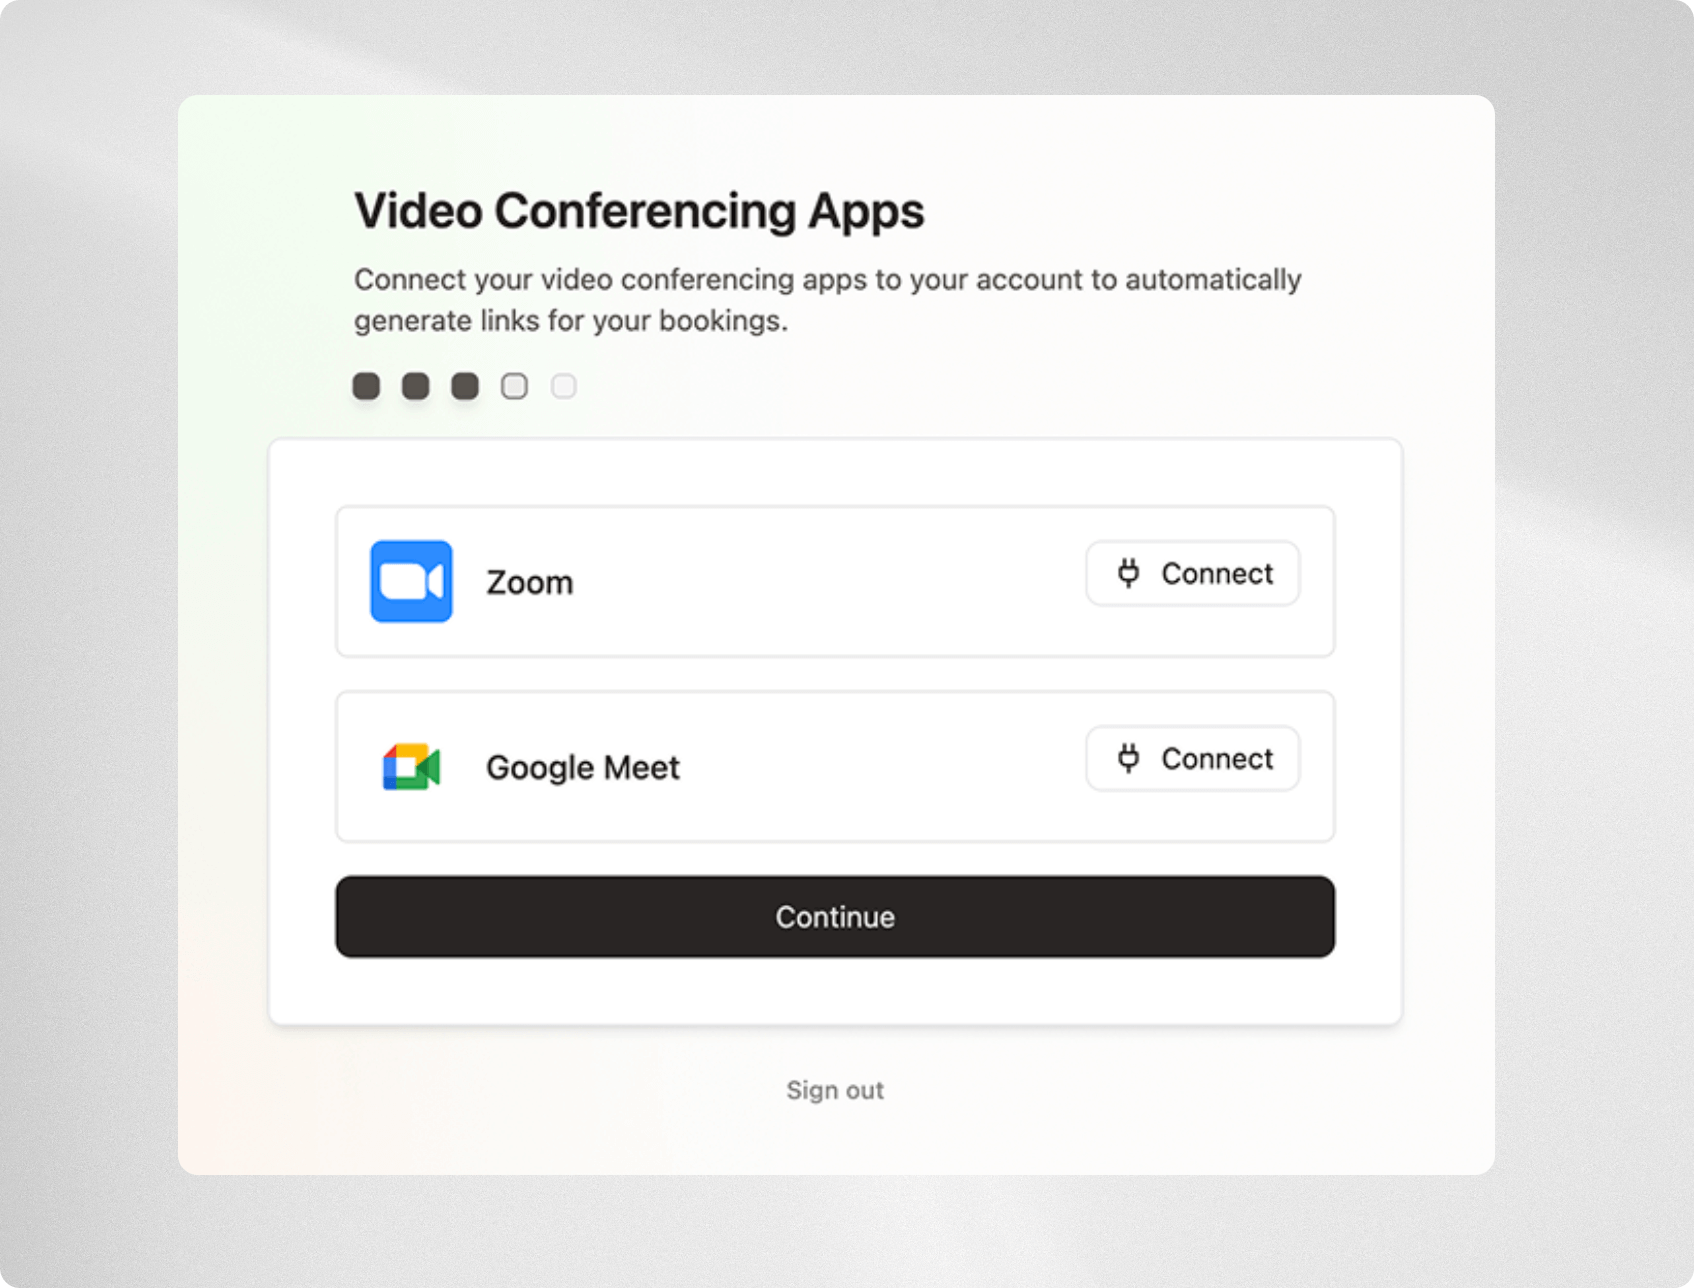
Step 4: Video Conferencing Apps
Link conferencing tools such as Google Meet, Microsoft Teams, or Zoom. Novacal will use your selected app as the default meeting location for new event types, though this can be changed later at any time.Google Meet requires a connected Google Calendar with automatic event creation
enabled to generate meeting links.
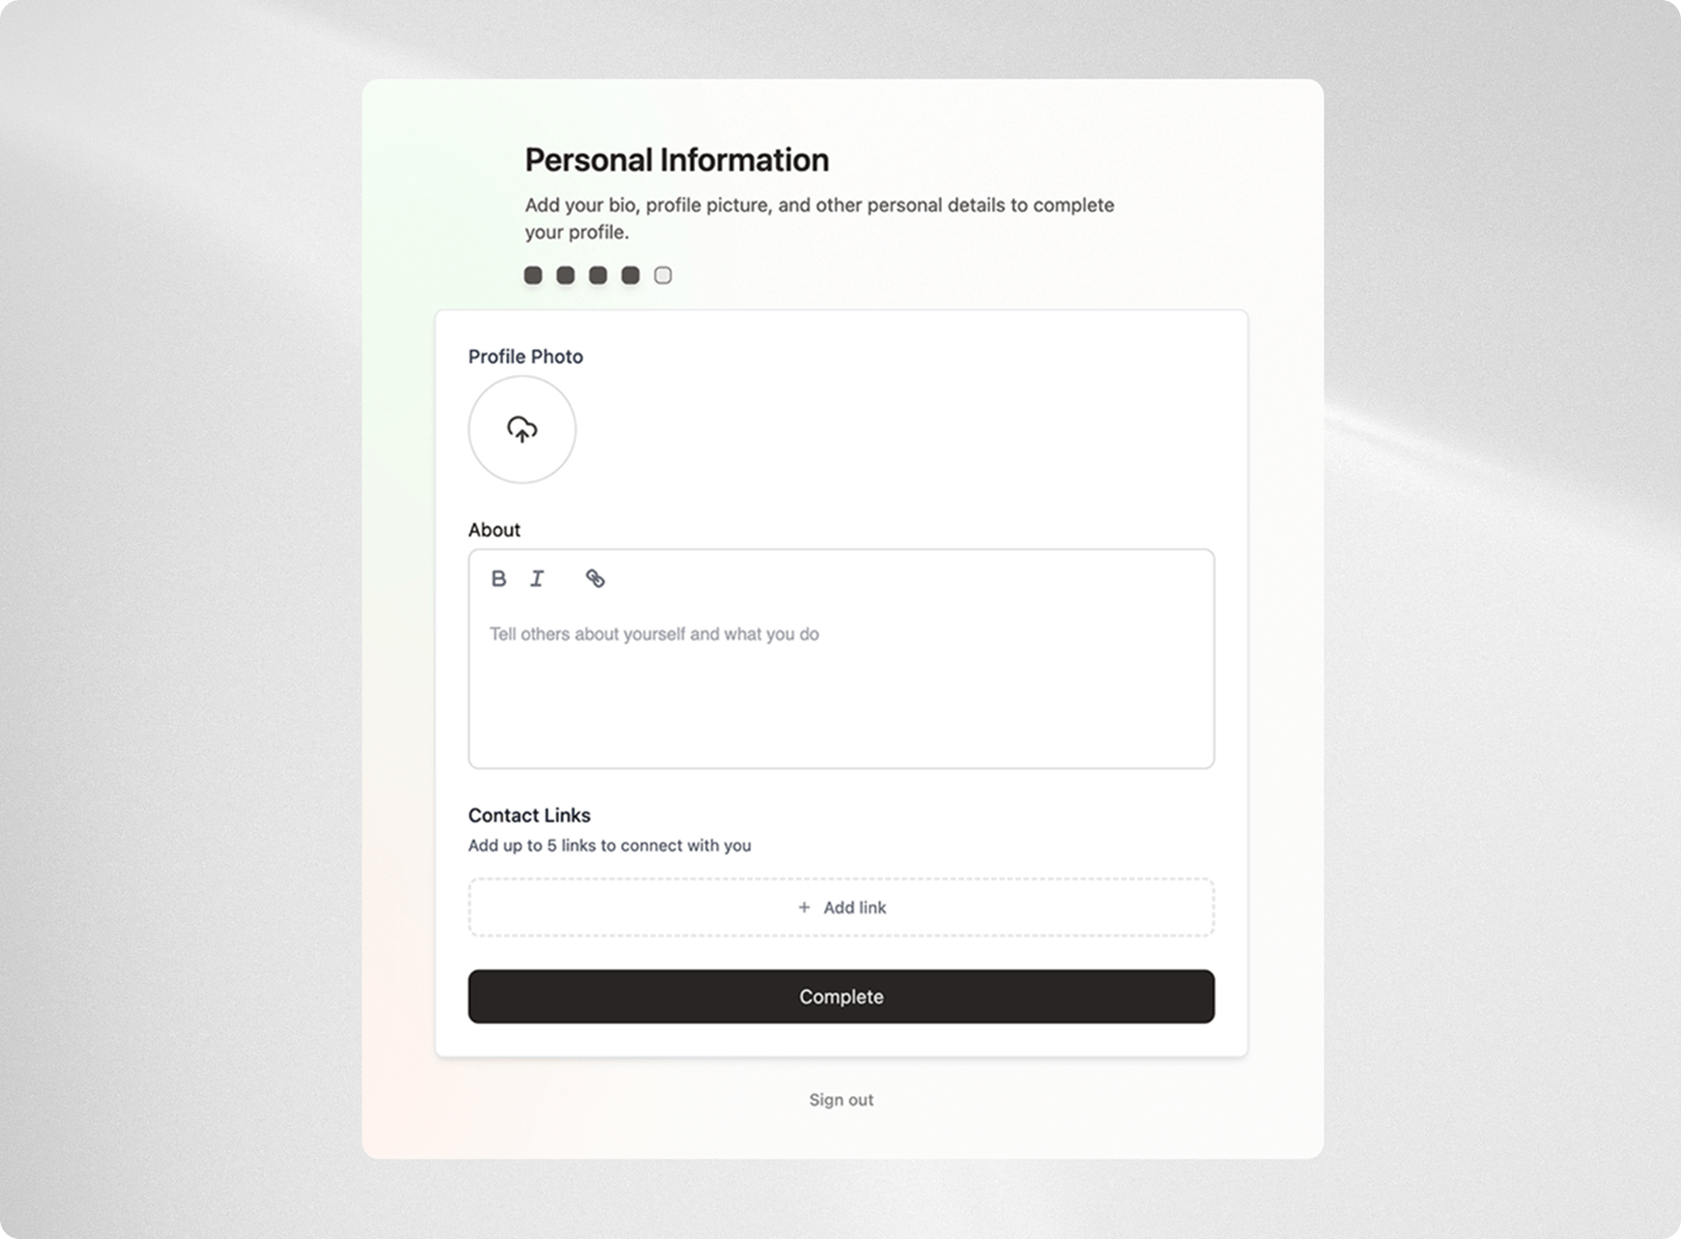
Step 5: Profile details
Personalize your public booking page by uploading an avatar, writing a short “About” section, and adding social links. These details will be visible to anyone using your booking link, helping you create a professional and approachable presence.